
First I got a starter from my mother-in-law, and I made a couple loaves of bread with that, and some waffles. It was pretty good as long I added commercial yeast, but I think either it was too old or I killed it somehow, because it just never got bubbly or foamy when I fed it, and when I didn't add commercial yeast to the bread, it didn't rise at all. Starters can last forever, I think--some bread companies are using 200-year-old starters--but I think you need to feed them periodically to make them last.
Then I learned that supposedly you can just collect wild yeast from the air and make your own starter. Just set out a water and flour mixture and feed, discard part, feed, discard part etc. until it becomes "active" with yeast. I tried this for a week or so, but no luck. I don't know if there just isn't enough yeast in the air or what. I think some parts of the country are better than others (maybe why San Francisco is famous for sourdough).
So, next, I got a starter on eBay. (If you don't live close enough to just divide the starter to share it, you can dry your starter and flake it into a plastic bag--then "reconstitute" it later--this is what the lady did, so she just sent it in an envelope and it was really cheap) and started working with that. You mix the flakes with flour and water, and then let it sit out and get active for 5 days, "feeding" it with new flour and water daily.
Then you can begin to bake! The starter has wild yeast in it, so it makes your bread rise and gives it a nice sour flavor.
Here is the starter before being fed for the day.

 You feed it with equal amounts flour and water and let it sit out for a few hours. You can make as much as you want, if you want to share some, for example, or make a big batch of something. (After the first 5 days, the starter gets bubbly and active in just a few hours.)
 Here it is when it is ready to use. Look how bubbly it got!
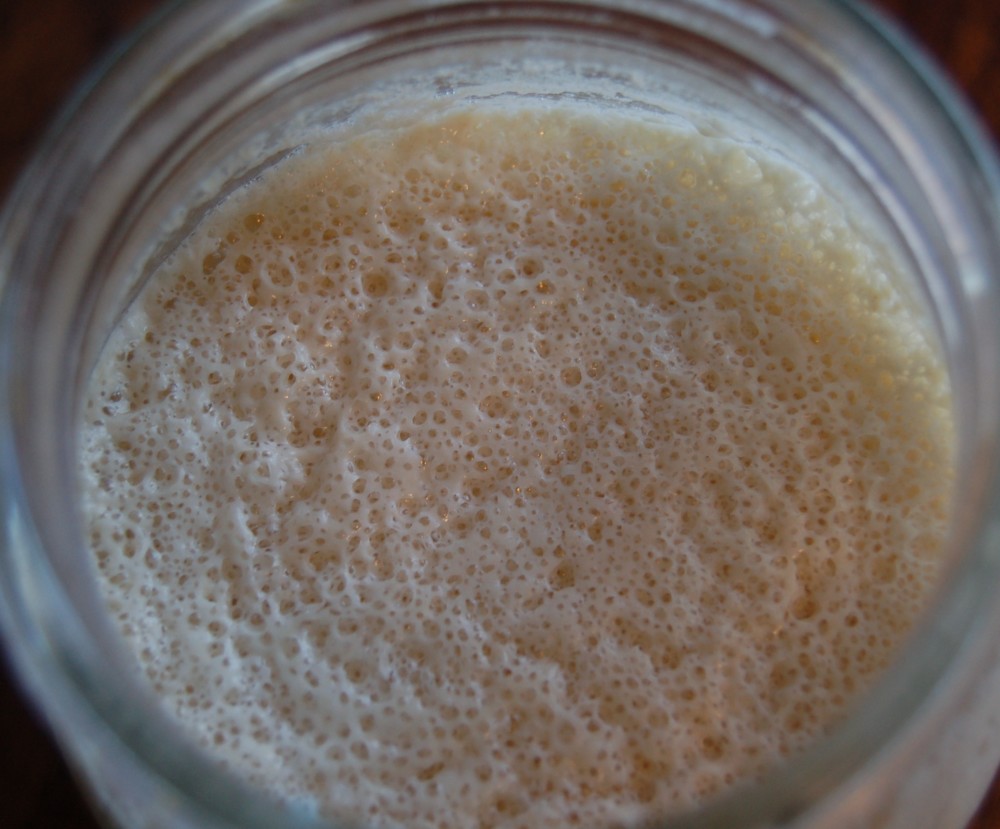 Next you make a "sponge" by adding a cup of the starter, 1 1/2 cups of warm water, and about 3 to 3 1/2 cups flour. It just looks like a lump of dough. (You can add commercial yeast, but you don't need to--the wild yeast in the starter makes it rise! I didn't add any yeast.) You let the sponge rise for 6-24 hours. It gets more sour the longer it sits out. Here is a picture of the sponge when first mixed.
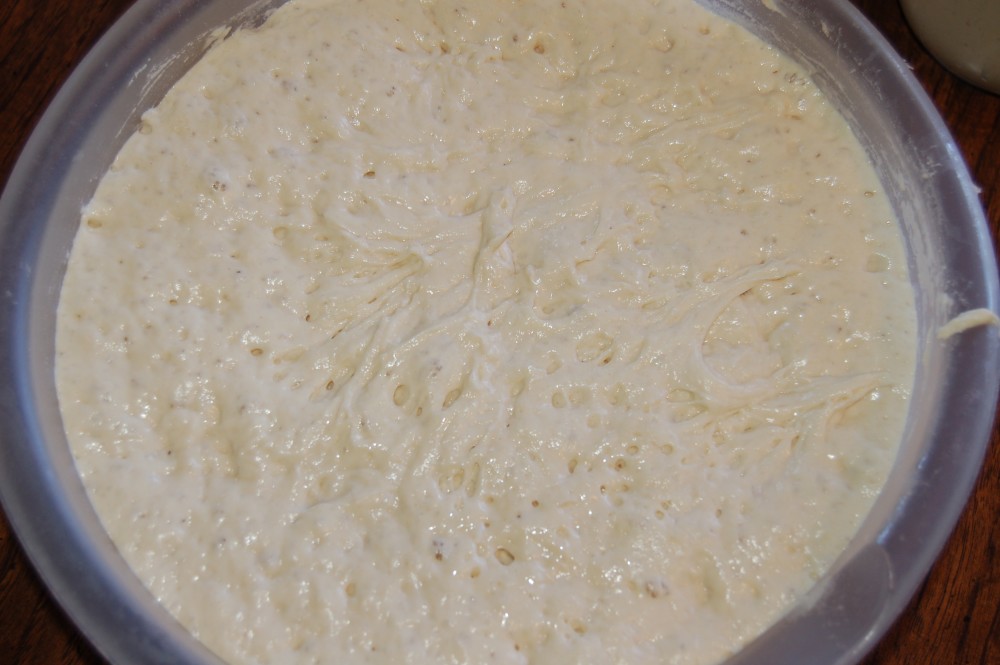
Then, here is the risen sponge. It is big and bubbly and spongy. Amazing!
 Then you mix in sugar, salt, and more flour to make the dough. It collapses down and looks like a lump again. Set it out in an oiled bowl to rise.
 Here is the risen dough. (takes longer to rise than commercial yeast dough, but not too much longer if it's in a nice warm place)
 Then you form it into loaves and let it rise again. And then bake. I also learned that you can get a nice chewy-tender crust by putting steam in the oven during the first few minutes of baking. I just sprayed the loaf and sides of the oven (avoiding the oven light, as I was warned to) with a spray bottle, and also put a pan of water on the bottom rack. This made it nice and steamy in the oven.
 And here is the finished product. It's so good! I love the flavor of sourdough bread! I have now also tried whole wheat sourdough with the same process, and it turns out great. I like the "character" that the starter and the wild yeast add to the bread. We also made some delicious sourdough wheat/oat pancakes, and I have several other recipes I want to try too.
I can now divide my starter, if anyone wants to give this a try. It has been really fun for me (of course I love to bake anyway) and I look forward to experimenting further!
No comments:
Post a Comment